第十节:Centos7配置OpenVPN
本节内容:如何在Centos7上安装配置openvpn
1、加载tun模块
modprobe tun
查看内核是否加载了 tun
[root@71764912qq ~]# lsmod | grep tun xfrm6_mode_tunnel 13227 0 xfrm4_mode_tunnel 13227 0 xfrm4_tunnel 12857 0 tunnel4 13252 1 xfrm4_tunnel2、安装openvpn
yum -y install openssl openssl-devel lzo openvpn easy-rsa3、拷贝证书生成环境到 /etc/openvpn目录
cp -r /usr/share/easy-rsa/ /etc/openvpn4、配置pki
5、创建CA证书cd /etc/openvpn/easy-rsa/3.0 ./easyrsa init-pki ./easyrsa build-ca nopass按回车结束
6、创建服务器证书,其中server 的名称可以自己任意命名
./easyrsa gen-req server nopass 按回车结束 ./easyrsa sign server server提示yes or no 的时,输入yes回车
7、生成“Diffie Hellman” 密钥
Diffie Hellman密钥交换是一种密码密钥交换方法,允许双方/节点通过不知道彼此存在的不安全通信信道建立共享密钥。
./easyrsa gen-dh需要2分钟时间
8、创建及编辑OPVPN 配置文件
vim /etc/openvpn/server.confport 1194 # default port proto udp # default protocol dev tun tun-mtu 1500 tun-mtu-extra 32 mssfix 1450 reneg-sec 0 ca /etc/openvpn/easy-rsa/3.0/pki/ca.crt cert /etc/openvpn/easy-rsa/3.0/pki/issued/server.crt key /etc/openvpn/easy-rsa/3.0/pki/private/server.key dh /etc/openvpn/easy-rsa/3.0/pki/dh.pem #plugin /usr/share/openvpn/plugin/lib/openvpn-auth-pam.so /etc/pam.d/login # 使用系统账号登录 #plugin /etc/openvpn/radiusplugin.so /etc/openvpn/radiusplugin.cnf # 使用freeradius账号登录 server 10.8.0.0 255.255.255.0 # 分配给VPN客户端的地址范围 ifconfig-pool-persist ipp.txt push "redirect-gateway def1" push "route 192.168.0.0 255.255.255.0" #指定VPN客户端访问你服务器的内网网段 push "dhcp-option DNS 8.8.8.8" push "dhcp-option DNS 8.8.4.4" keepalive 2 20 comp-lzo persist-key persist-tun status openvpn-status.log log-append openvpn.log verb 3 script-security 3 auth-user-pass-verify /etc/openvpn/checkpsw.sh via-env client-cert-not-required #启用后,就关闭证书认证,只通过账号密码认证 username-as-common-name9、创建密码验证文件
touch /etc/openvpn/checkpsw.sh chmod +x /etc/openvpn/checkpsw.sh vi /etc/openvpn/checkpsw.sh#!/bin/sh ########################################################### # checkpsw.sh (C) 2004 Mathias Sundman <mathias@openvpn.se> # # This script will authenticate OpenVPN users against # a plain text file. The passfile should simply contain # one row per user with the username first followed by # one or more space(s) or tab(s) and then the password. PASSFILE="/etc/openvpn/psw-file" LOG_FILE="/var/log/openvpn-password.log" TIME_STAMP=`date "+%Y-%m-%d %T"` ########################################################### if [ ! -r "${PASSFILE}" ]; then echo "${TIME_STAMP}: Could not open password file \"${PASSFILE}\" for reading." >> ${LOG_FILE} exit 1 fi echo "user:${username} psw:${password}" CORRECT_PASSWORD=`awk '($1=="'${username}'")&&($3==1) {print $2}' ${PASSFILE}` echo ${CORRECT_PASSWORD} if [ "${CORRECT_PASSWORD}" = "" ]; then echo "${TIME_STAMP}: User does not exist: username=\"${username}\", password=\"${password}\"." >> ${LOG_FILE} exit 1 fi if [ "${password}" = "${CORRECT_PASSWORD}" ]; then echo "${TIME_STAMP}: Successful authentication: username=\"${username}\"." >> ${LOG_FILE} exit 0 fi echo "${TIME_STAMP}: Incorrect password: username=\"${username}\", password=\"${password}\"." >> ${LOG_FILE} exit 110、创建密码文件
touch /etc/openvpn/psw-file加入密码内容,其中test为用户名,123456 为密码,注意,末尾要加1,否则提示密码错误
echo 'test 123456 1' > /etc/openvpn/psw-file启动openvpn
systemctl start openvpn@server11、iptables配置
iptables -A INPUT -p udp -m udp --dport 1194 -j ACCEPT #配置允许拨入的vpn客户允许上网,其中enp2s0是外网卡接口 iptables -t nat -A POSTROUTING -s 10.8.0.0/24 -o enp2s0 -j MASQUERADE #如果有2个网卡,并且vpn用户需要访问其他网断,这些网断在vpn服务器上能够到达,其中enp3s0是内网地址,192.168.11.254是内网卡IP iptables -t nat -A POSTROUTING -s 10.8.0.0/24 -o enp3s0 -j SNAT --to-source 192.168.11.25412、客户端配置
下面内容不在服务器上配置,在客户端上进行配置
1)下载openvpn客户端软件
下载地址:https://openvpn.net/index.php/open-source/downloads.html
2)新建1个文件命名为client.ovpn
内容如下:
client dev tun proto udp remote 192.168.0.107 1194 # – Your server IP and OpenVPN Port route 192.168.9.0 255.255.255.0 vpn_gateway #只有到192.168.9.0 网断的地址走VPN resolv-retry infinite nobind tun-mtu 1500 tun-mtu-extra 32 mssfix 1450 persist-key persist-tun ca ca.crt auth-user-pass comp-lzo reneg-sec 0 verb 3关于VPN路由的进一步说明
默认情况下,VPN连接成功后会自动增加一些路由,并把网关设置成vpn的,所以所有的流量都会通过VPN来传送,但是如果使用openvpn,可以自己修改路由,指定某些ip走vpn,或者某些ip不走vpn,从而达到节省流量或者提高访问速度的目的。openvpn有以下两种方法修改路由表
方法一、修改客户端配置文件
这种情况只要改本地配置文件即可,服务器不需要修改。适合客户端比较多且网络条件比较复杂,某些客户端有定制路由的需求,或者临时有修改的情况。例如打开openvpn的配置文件open.ovpn,在“max-routes 1000” 后加入相应的路由就
route 10.252.252.0 255.255.255.0 net_gateway route 103.103.103.0 255.255.255.0 net_gateway说明:最后一个参数“net_gateway”表示强行指定IP段不使用vpn,还有一个正好相反的“vpn_gateway”强行指定IP段使用VPN
方法二、在服务器端配置
在服务器中配置推送全局路由,客户端不需要更改任何配置,适合客户端网络条件比较相似的情况。在openvpn服务器的配置文件中加入
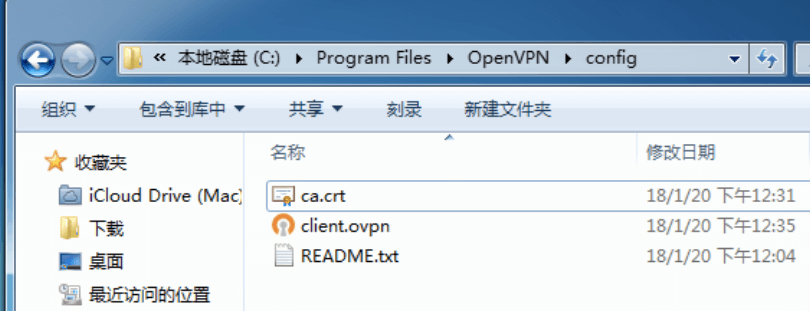
push "route 10.252.252.0 255.255.255.0 net_gateway" push "route 192.168.1.0 255.255.255.0 net_gateway"3)把上面新建的文件,和服务器上的/etc/openvpn/easy-rsa/3.0/pki/ca.crt 文件拷贝到客户端 Openvpn/config 目录下放,如下图所示,然后点击连接进行连接。